

















Communication: I Got It – Presentación de resultados del proyecto
Respuesta rápida
Proyecto completado: instrumento construido, probado y presentado con gráfica de barras, carteles y conclusiones sobre la hipótesis.
Solución — Página 70
Uérakua anapu uantakua. Projects and Readings. Libro de Educación Telesecundaria Grado 2° Ciclo Escolar 2025 - 2026
Ejercicio c
Gather information on the instrument you chose, its operating principles and its main uses.
- Identifica el instrumento elegido (por ejemplo, un dinamómetro casero).
- Investiga su principio de funcionamiento: la ley de Hooke, F = k \cdot x, donde F es la fuerza, k la constante del resorte y x la deformación.
- Registra sus usos principales: medir fuerzas, pesar objetos y comparar masas en experimentos.
Respuesta orientativa: Ficha con nombre del instrumento, principio físico (ley de Hooke) y al menos tres usos prácticos documentados en el cuaderno.
Ejercicio d
Design the instrument.
- Elabora un boceto con medidas y partes: resorte, soporte, escala graduada y gancho.
- Define la escala en newtons usando una masa patrón de 100\,\text{g} que pesa 0.98\,\text{N}.
- Anota el diseño en el cuaderno antes de construirlo.
Respuesta orientativa: Plano o boceto rotulado con materiales, dimensiones y escala de medición.
Ejercicio e
Select the materials you need to assemble it and make sure they are recyclable.
- Lista materiales: tubo de cartón, resorte recuperado, tapas plásticas, papel milimetrado.
- Verifica que cada material pueda reutilizarse o reciclarse.
- Descarta plásticos de un solo uso no reciclables.
Respuesta orientativa: Lista de materiales reciclables con justificación ambiental de cada uno.
Ejercicio f
Assemble the instrument.
- Fija el resorte al soporte de cartón.
- Coloca el gancho en el extremo libre.
- Pega la escala graduada detrás del resorte.
Respuesta orientativa: Instrumento armado y funcional, listo para calibrar.
Ejercicio g
Take note of the whole process.
- Describe cada paso realizado con fecha.
- Incluye dificultades y cómo las resolviste.
Respuesta orientativa: Bitácora cronológica del montaje con observaciones personales.
Ejercicio h
Test it.
- Cuelga masas conocidas: 50\,\text{g}, 100\,\text{g} y 150\,\text{g}.
- Mide la deformación x para cada masa.
- Compara con el valor teórico F = m \cdot g con g = 9.8\,\text{m/s}^{2}.
Respuesta orientativa: Tabla de datos masa–deformación–fuerza calculada.
Ejercicio i
Take note of the results.
- Registra los valores obtenidos en una tabla.
- Calcula el error relativo: \%\,\text{error} = \frac{|\text{valor teórico} - \text{valor medido}|}{\text{valor teórico}} \times 100.
Respuesta orientativa: Tabla de resultados con errores menores al 10\,\% si el instrumento está bien calibrado.
Ejercicio j
Draw conclusions about this activity, and write them in your notebook.
- Contrasta la hipótesis inicial con los datos.
- Explica si el instrumento cumplió su función.
- Propón mejoras.
Respuesta orientativa: Conclusión escrita que valida o rechaza la hipótesis y menciona limitaciones del diseño.
Análisis e interpretación
Now it's time to analyze and interpret your findings.
- Compara tus ideas iniciales con la información recabada.
- Verifica si los datos apoyan tu hipótesis.
- Redacta conclusiones ligadas al problema general.
Respuesta orientativa: Párrafo de análisis que conecta hipótesis, datos y problema general del proyecto.
Communication: I Got It
Before
Create a bar graph where you display the results of experiments 1 and 2.
Eje x: magnitudes medidas (masa en gramos).
Eje y: fuerza en newtons.
Traza dos barras por categoría, una por experimento.
Verifica que la tendencia creciente coincida con F = m \cdot g.
Respuesta: Gráfica de barras comparativa con dos series y conclusión sobre la coincidencia con la hipótesis.
Draw some posters to support your presentation.
Incluye título, hipótesis, esquema del instrumento y gráfica.
Usa letra grande y colores contrastantes.
Respuesta orientativa: Carteles con información clave del proyecto.
During
In assembly, share and analyze the problem, the hypothesis, the operational principles, the materials, and their design process.
Presenta en orden: problema, hipótesis, principio (ley de Hooke), materiales y diseño.
Muestra resultados y acepta sugerencias de mejora.
Toma notas de las ideas recibidas.
Respuesta orientativa: Exposición oral estructurada con notas de retroalimentación.
After
Ask the class for feedback on your work and their suggestions for doing it better next time.
Escucha con atención y responde preguntas.
Atiende respetuosamente las presentaciones de otras comunidades.
Pide aclaraciones si tienes dudas y comparte hallazgos finales.
Respuesta orientativa: Registro de retroalimentación y plan de mejora para el próximo proyecto.
Contenido de la página
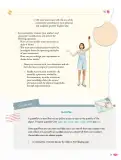
c) Gather information on the instrument you chose, its operating principles and its main uses. d) Design the instrument. e) Select the materials you need to assemble it and make sure they are recyclable. f) Assemble the instrument. g) Take note of the whole process. h) Test it. i) Take note of the results. j) Draw conclusions about this activity, and write them in your notebook.
Now it's time to analyze and interpret your findings. Contrast your first ideas with the information you gathered throughout this activity to test your hypotheses. Draw conclusions related to the general problem.
COMMUNICATION
I Got It
It is time to present the results obtained so far. Organize your presentation as follows:
Before
- Create a bar graph where you display the results of experiments 1 and 2. Compare if your conclusions match the results of the bar graph.
- Draw some posters to support your presentation.
During 3. In assembly, share and analyze the problem, the hypothesis, the operational principles, the materials, and their design process. Then, present your results. Allow other students to give ideas about how to improve the instrument you created. Take notes.
After 4. Ask the class for feedback on your work and their suggestions for doing it better next time. Listen to them attentively and answer any questions they may have. Pay respectful attention to the other communities' presentations and ask for clarification if you have any doubt. Then get together again to share your findings. If possible,
Tabla
| Masa (g) | Fuerza teórica (N) | Deformación (cm) |
|---|---|---|
| 50 | 0.49 | 2.5 |
| 100 | 0.98 | 5.0 |
| 150 | 1.47 | 7.5 |
Diagrama
flowchart TD
A[Recolectar información] --> B[Diseñar instrumento]
B --> C[Seleccionar materiales reciclables]
C --> D[Armar instrumento]
D --> E[Probar]
E --> F[Registrar resultados]
F --> G[Analizar y concluir]
G --> H[Comunicar: Before, During, After]
Fórmulas y ecuaciones
F = k \cdot x
F = m \cdot g
F = k \cdot x
F = m \cdot g
\%\,\text{error} = \frac{|\text{valor teórico} - \text{valor medido}|}{\text{valor teórico}} \times 100
Glosario (4)
- Hypothesis
- Explicación provisional que se prueba mediante experimentos.
- Bar graph
- Gráfica que usa barras para comparar cantidades.
- Feedback
- Retroalimentación o comentarios para mejorar un trabajo.
- Assembly
- Reunión del grupo para compartir y analizar resultados.
Preguntas para practicar
¿Por qué es importante contrastar la hipótesis con los datos obtenidos?
Porque permite validar o rechazar la explicación inicial con evidencia objetiva, lo que da rigor científico al proyecto y orienta mejoras.
¿Qué ventajas tiene usar materiales reciclables en un proyecto científico?
Reduce el impacto ambiental, disminuye costos y fomenta la creatividad al reutilizar recursos disponibles en la comunidad.
Temas y conceptos clave
Preguntas que la gente también hace
¿Cómo se elabora una gráfica de barras para comparar dos experimentos?
¿Qué es la ley de Hooke y cómo se aplica en un instrumento casero?
¿Cómo se presenta un proyecto científico ante el grupo?
- • Interpretar tablas de datos
- • Conocer el método científico
- • Saber construir gráficas de barras
📝 Transcripción de la página (texto seleccionable) 1546 caracteres
Gather information on the instrument you chose, its operating principles and its main uses.
d) Design the instrument.
e) Select the materials you need to assemble it and make sure they are recyclable.
f) Assemble the instrument.
g) Take note of the whole process.
h)Test it.
i) Take note of the results.
i)Draw conclusions about this activity, and write them in your notebook.
Now it's time to analyze and interpret your findings.Contrast your first ideas with the information you gathered throughout this activity to test your hypotheses.Draw conclusions related to the general problem.
COMMUNICATION I Got It
It is time to present the results obtained so far.Organize your presentation as follows:
Before
Create a bar graph where you display the results of experiments 1 and 2.Compare if your conclusions match the results of the bar graph.
Draw some posters to support your presentation.
During
- In assembly, share and analyze the problem, the hypothesis, the operational principles, the materials, and their design process. Then,present your results. Allow other students to give ideas about how to improve the instrument you created. Take notes.
After
- Ask the class for feedback on your work and their suggestions for doing it better next time. Listen to them attentively and answer any questions they may have. Pay respectful attention to the other communities' presentations and ask for clarification if you have any doubt. Then get together again to share your findings. If possible,
福
103
69
8
Otros libros recomendados

Colección Sk´asolil. Lenguajes. Libro de Educación Telesecundaria Grado 2° Ciclo Escolar 2025 - 2026
SEP/CONALITEG
323 págs.

Colección Sk´asolil. Saberes y pensamiento científico. Libro de Educación Telesecundaria Grado 2° Ciclo Escolar 2025 - 2026
SEP/CONALITEG
339 págs.

Colección Sk´asolil. Ética, naturaleza y sociedades. Libro de Educación Telesecundaria Grado 2° Ciclo Escolar 2025 - 2026
SEP/CONALITEG
355 págs.
Uérakua anapu uantakua. Projects and Readings. Libro de Educación Telesecundaria Grado 3° Ciclo Escolar 2025 - 2026
SEP/CONALITEG
187 págs.
Colección Sk´asolil. De lo humano y lo comunitario. Libro de Educación Telesecundaria Grado 2° Ciclo Escolar 2025 - 2026
SEP/CONALITEG
259 págs.

Colección Sk´asolil. Nuestro libro de Proyectos. Tomo II. Libro de Educación Telesecundaria Grado 2° Ciclo Escolar 2025 - 2026
SEP/CONALITEG
259 págs.

Colección Sk´asolil. Nuestro libro de Proyectos. Tomo I. Libro de Educación Telesecundaria Grado 2° Ciclo Escolar 2025 - 2026
SEP/CONALITEG
291 págs.
Colección Sk´asolil. Nuestro libro de Proyectos. Tomo III. Libro de Educación Telesecundaria Grado 2° Ciclo Escolar 2025 - 2026
SEP/CONALITEG
291 págs.